Create A Session
A "Session" is the central concept to the GRID workflow. A session is a development environment that combines a certain robot and a simulation environment with a collection of AI models, providing a toolkit for scenario creation, data generation, model inference, and evaluation/testing. While creating a session, users can select the type of simulation environment, configure robot parameters, set up camera views and sensors, and preconfigure AI models.
Available Sample Sessions
Our Sample Scenarios section provides predefined simulation environments to assist users in developing AI capabilities for robotics. Each scenario features a robot, an environment, and AI models for tasks such as computer vision, object detection, and segmentation.
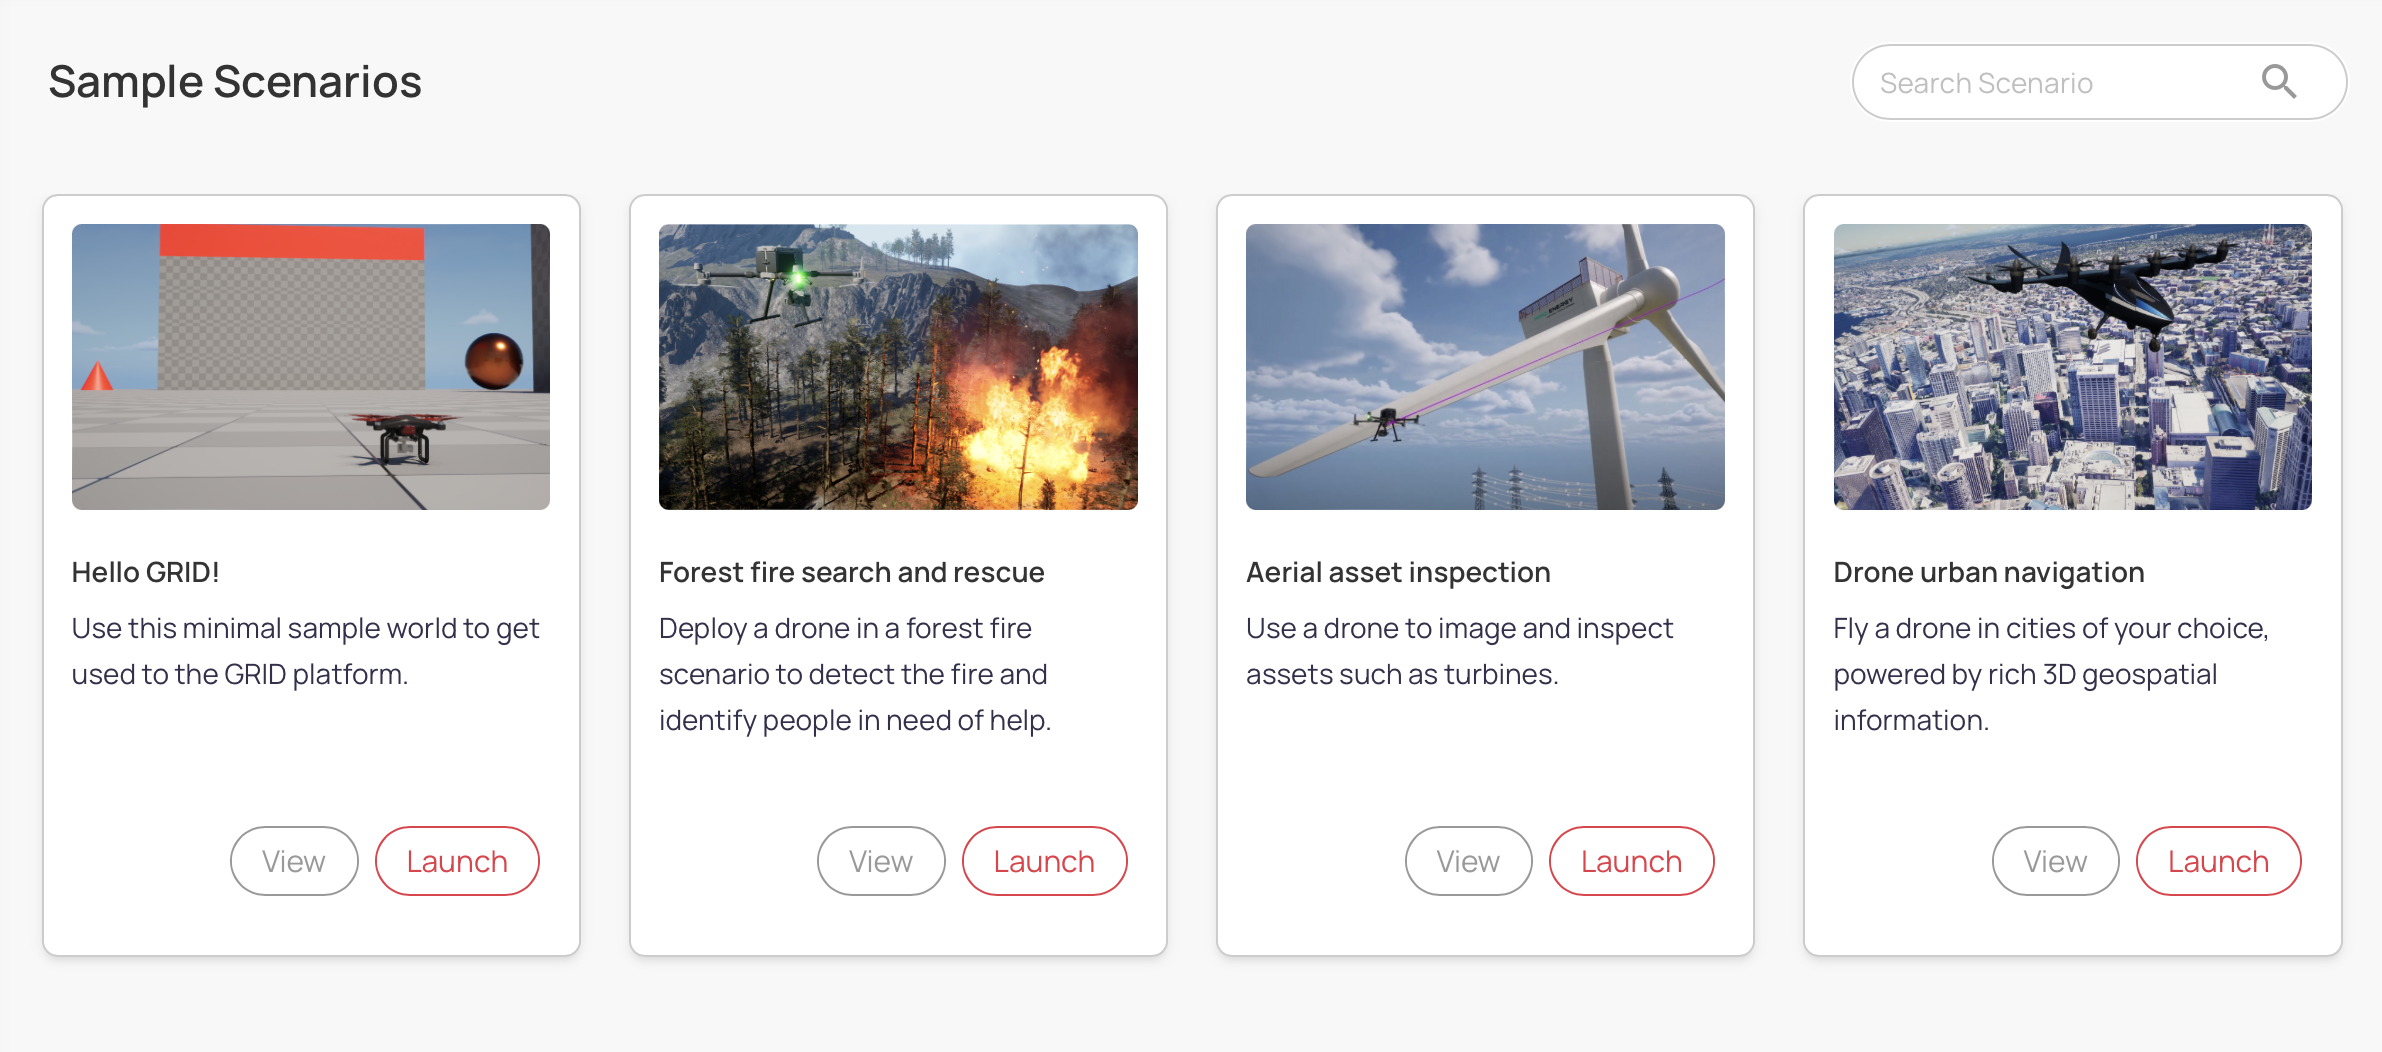
Currently, we provide the following sample sessions for users to get started quickly:
Hello GRID: A minimal scenario for familiarizing users with the platform.
Forest Fire Search and Rescue: Simulates drone-based search and rescue missions in a forest fire setting.
Aerial Asset Inspection: Uses drones for inspecting electrical infrastructure, such as wind turbines and powerlines.
Drone Urban Navigation: Simulates drone navigation in real-world locations using Google Photorealistic 3D tiles.
Lunar Rover Exploration: A space robotics simulation featuring a lunar rover in a low-gravity environment.
Suburban Robot Delivery: A suburban scenario with a delivery robot equipped with a LiDAR sensor.
Configuring a Custom Session
To create a custom session, follow these general steps:
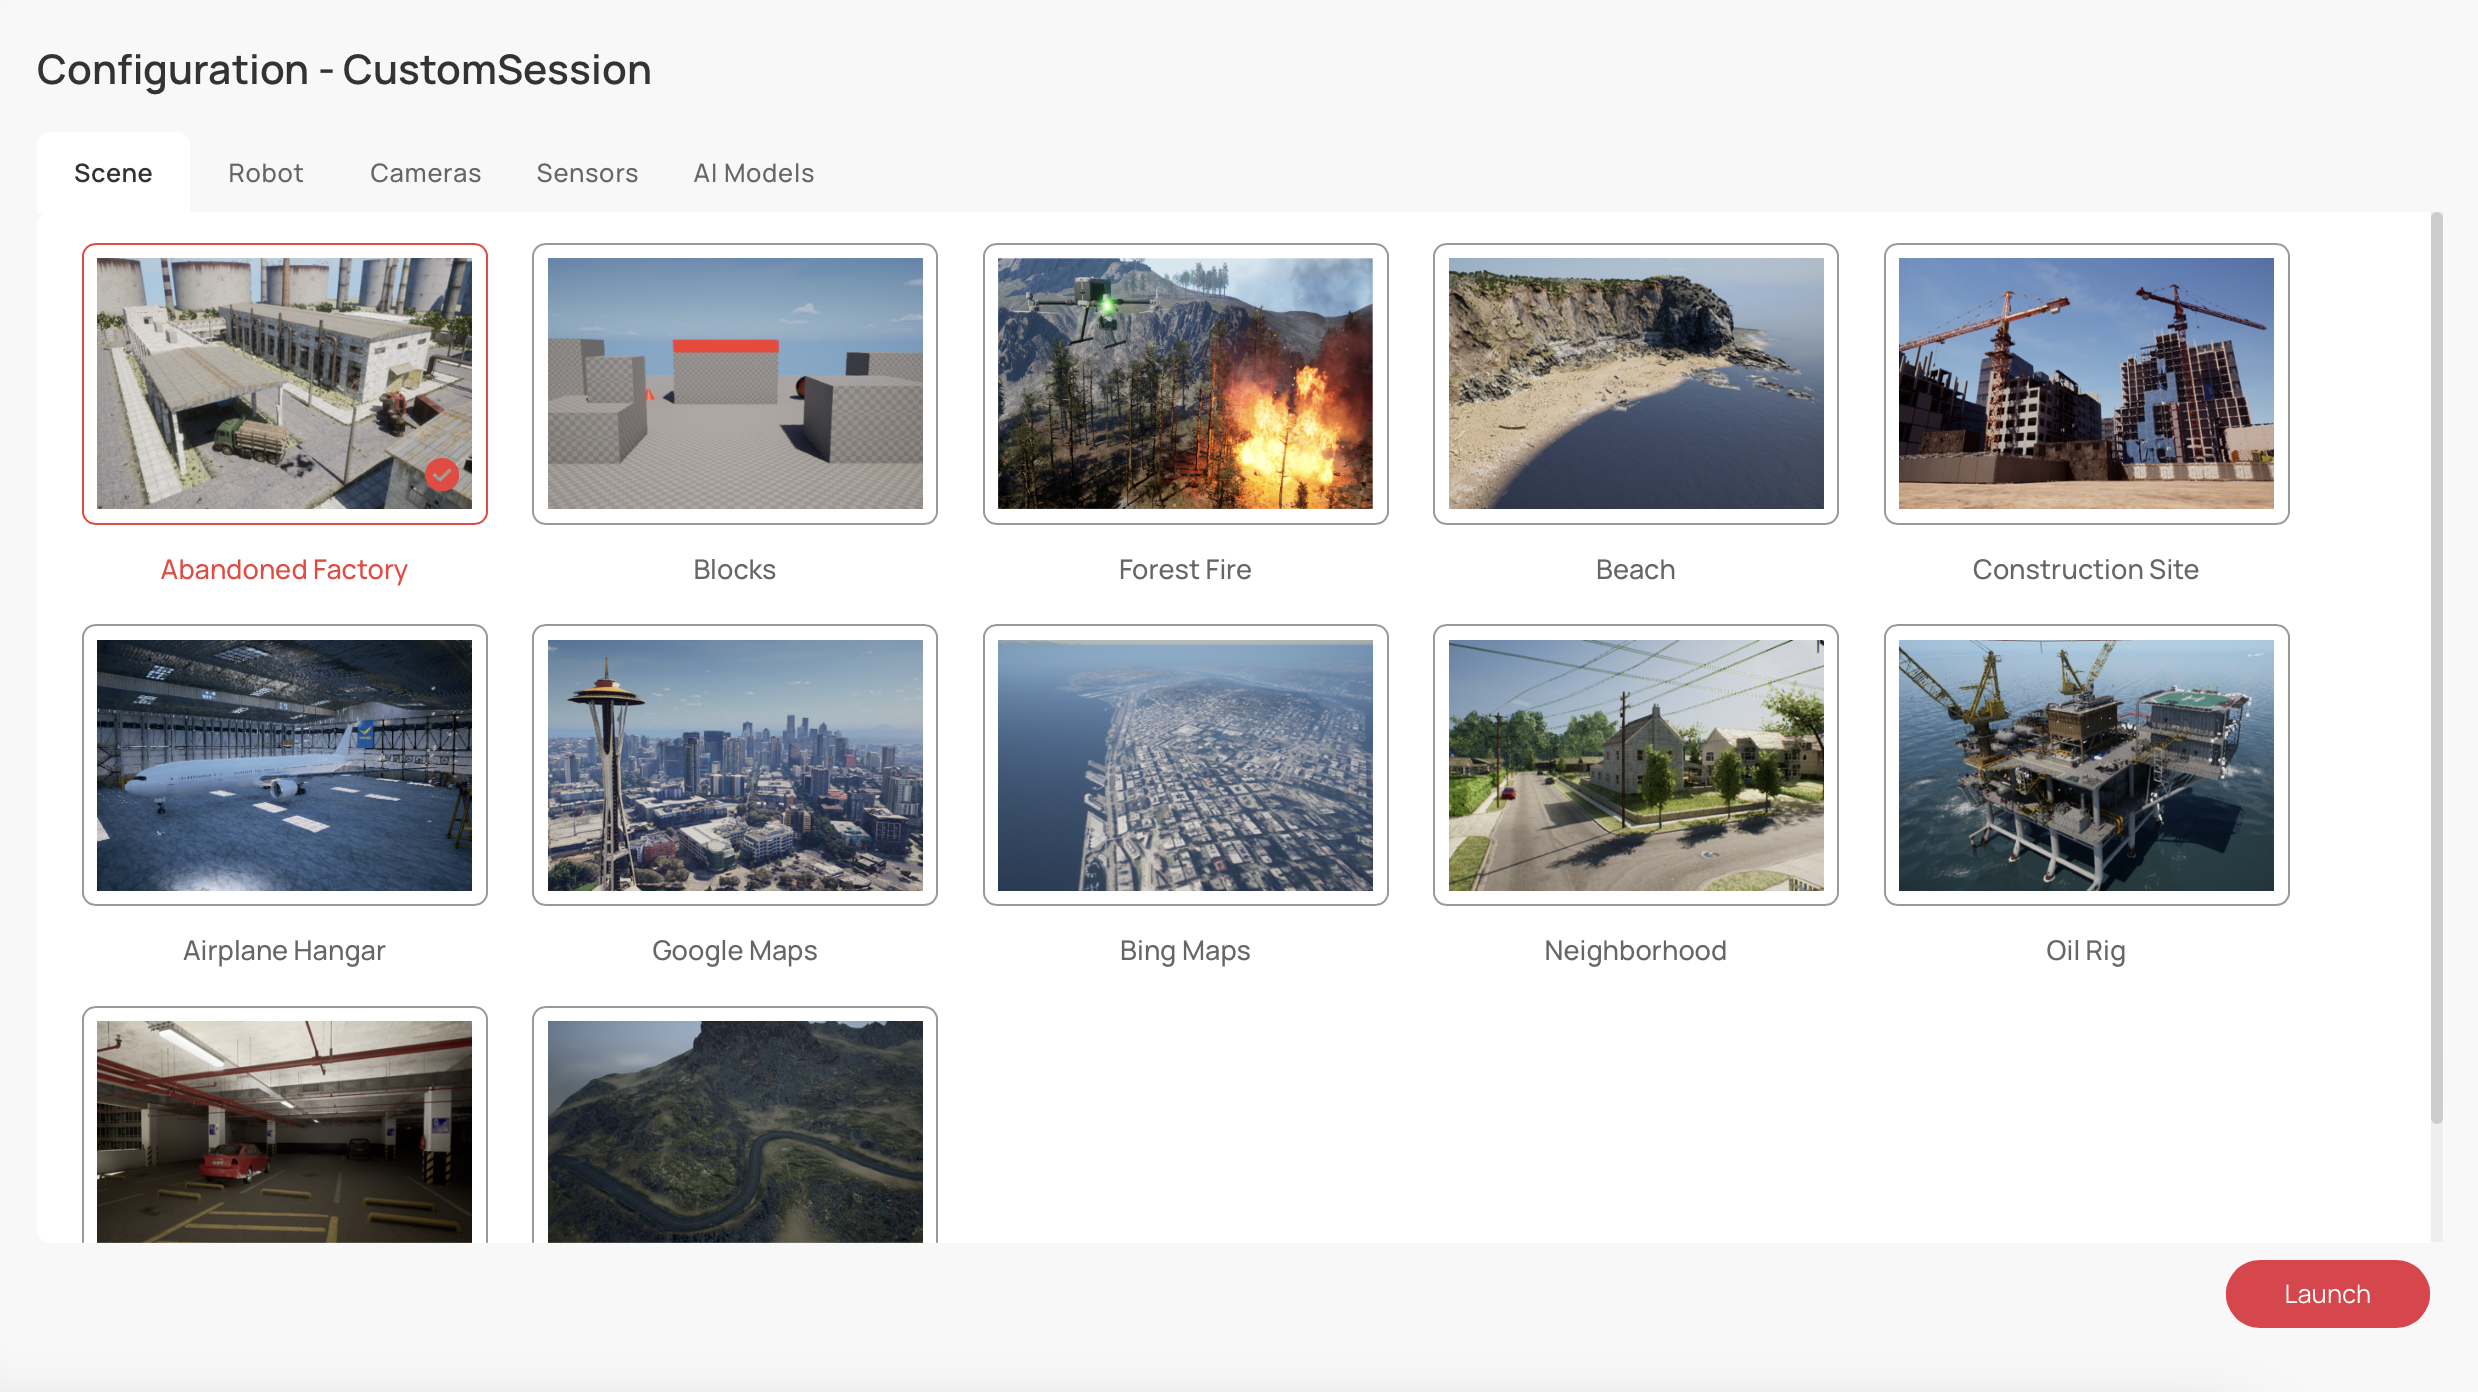
Select a Scene: Choose from a variety of environments: urban settings through Google or Bing Maps, natural scenes like beaches or forests, or specialized locations like oil rigs and construction sites. More information about scene selection is available under the 'Scene' tab.
Configure the Robot: Select a robot (either aerial or wheeled) and define its characteristics. More information about robot data configuration is available under the 'Robot' tab.
Set Up Cameras: Configure camera parameters to get the desired views and parameters for your simulation. The 'Cameras' tab will guide you through the setup process.
Adjust Sensors: Customize the sensors on your robot to detect and interact within the simulation environment. Details for sensor configuration can be found in the 'Sensors' tab.
Choose AI Models: Preconfigure the AI models that will be used in your simulation, such as computer vision, detection, and segmentation models. Navigate to the 'AI Models' tab for selection and setup. If you have not decided on AI models yet, you can still import them (Models) after starting the session.
Launching Your Custom Session
Once you have configured your simulation environment, robot, cameras, sensors, and AI models:
Click the Launch button, typically located at the bottom or top-right corner of the interface, to initiate your customized simulation.
Note
The availability of scenes, robots, cameras, sensors, and AI models may vary depending on your subscription plan and the current version of the GRID platform.
Advanced Configuration Options
For users who require advanced configuration options:
Detailed documentation is provided within each configuration tab. It's recommended to review these sections to understand all the capabilities and limitations of each configuration parameter.
Expert users can access additional settings for fine-tuning simulation parameters to match very specific use case requirements.
Note
Advanced configurations may require a deeper understanding of the simulation environments and AI models. Proceed with caution and consult the detailed documentation if needed.
Configuration Details: